
One of the advantages of digital content is that everything lives in your computer, in the cloud, or both. But while you do not have to make space for your CDs, DVDs, and games in your bookshelf, you still have to make space in your hard drive and sometimes, that is easier said than done. In previous generations, hard drives were generally expensive and getting another drive just to host your media content was a considerable purchase. Now, however, there are perfectly valid drives with 1TB of storage or more which you can grab for around $70.
Since those hard drives are probably going to last you forever, it is probably a good idea to invest in one right away and also move your entire iTunes library in it so that you can save some space in your main drive.
The iTunes folder
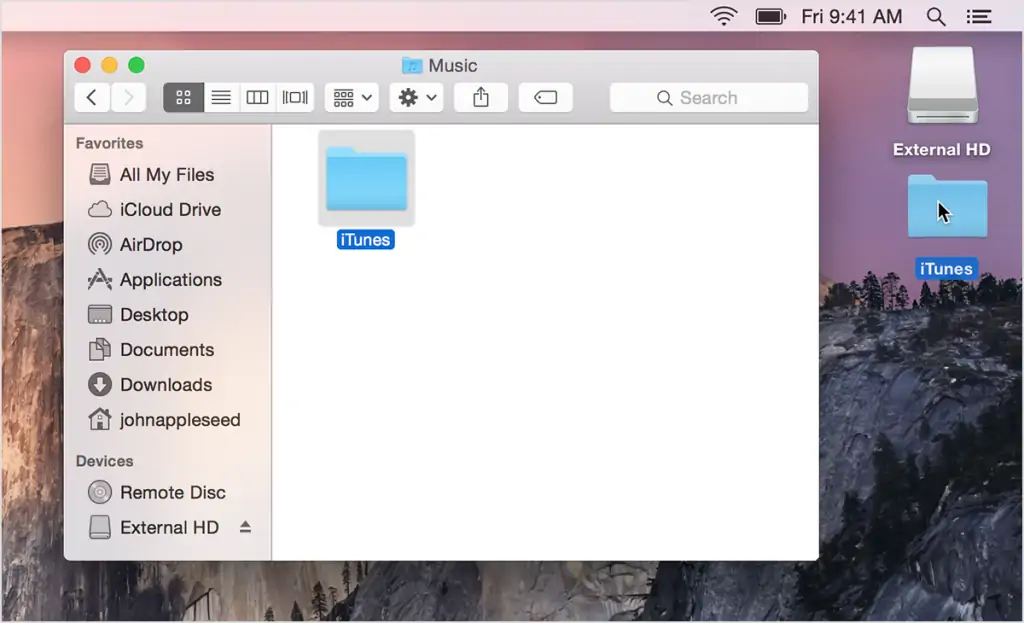
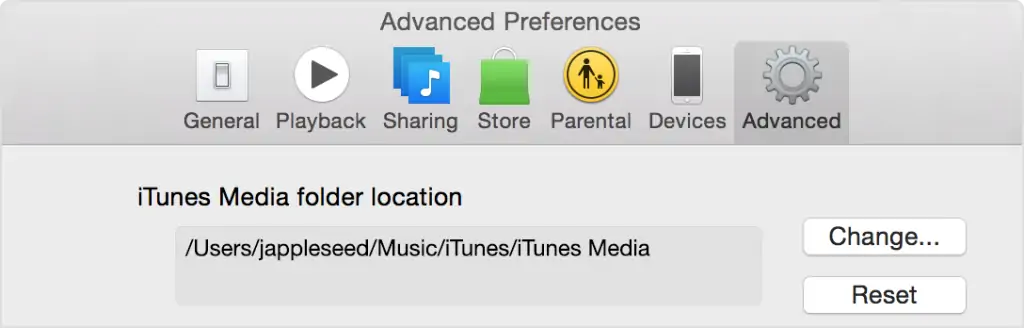
Every piece of content that you purchase or add in iTunes can be found on an eponymous folder on your computer. On OS X, go to Home > Music > iTunes. On Windows, look for the Music folder in your Libraries (usually located in C:\Users\UserName\Music) and you should find the iTunes folder stored within. If you cannot find it, open the Preferences menu of iTunes, go to the Advanced tab and you will see the Media folder’s location at the very top of the window.
The files you will find there are important to iTunes as they regulate various areas such as the media database, the various pieces of artwork from albums and songs, and more. Since we merely want to move the library to another location, you should leave everything untouched for now.
One more thing that is worth noting here is that the iTunes Media folder contains pretty much everything you have ever gotten through iTunes, including songs, movies, audiobooks, and apps. How the folder is organized depends on your iTunes settings. More specifically, there is an option to automatically rename songs based on their title and track number, after which they are automatically placed into specific album and artist folders.
Consolidating the library
Of course, iTunes is probably not the only place you get your music from. In fact, I am willing to bet that the majority of you have added tracks from external locations to Apple’s music service. This is a perfectly reasonable course of action but moving all files to an external drive will require you to consolidate your library first. When you add songs to iTunes from other locations of your computer, you have the option to copy those tracks into the iTunes Media folder. This will simply make sure that your entire library will be moved at the same time so you will not have to add the songs manually once again.
The option can be enabled in the Preferences menu for future tracks but you can do it for existing ones as well. More details on Step 6 and 7 below.
Moving iTunes to an external drive
- Launch iTunes.
- Click on iTunes > Preferences (OS X) or Edit > Preferences (Windows).
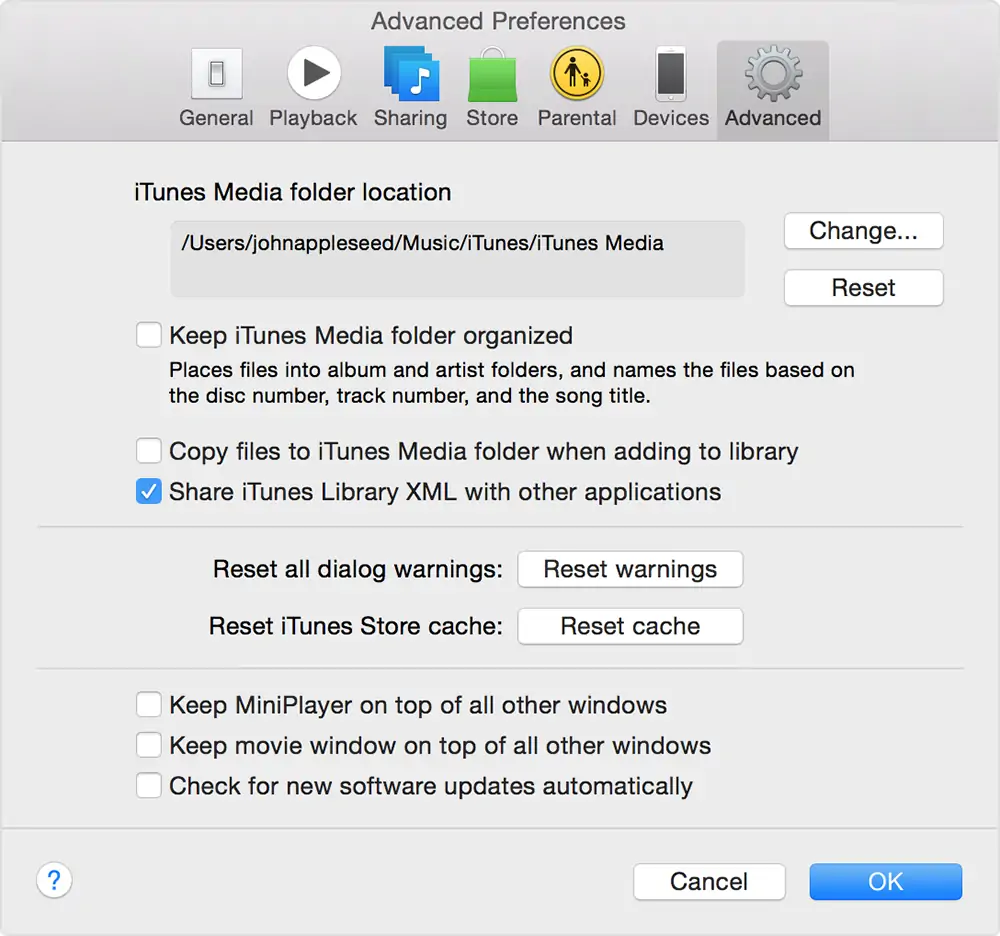
- Go to the Advanced tab.
- Tick the box that reads “Copy files to iTunes media folder when adding to library”.
- Click on OK to save the setting and close the Preferences window.
- Go to File > Library > Organize Library.
- There are two options here. You only need to enable the one the “Consolidate files” setting but you can also choose to reorganize your files if you want.
- Click on OK to save the settings and close the window. At this point iTunes will start copying files from their original locations to the iTunes Media folder. The original files will not be deleted so do not worry about that.
- When the process is over, quit iTunes and then open its folder in Finder or Windows Explorer.
- Once you get there, copy/move the entire folder into a new location in your external drive. Depending on the number of files that you have, the process can take a very long time so you might want to do something else until it is done.
- After the files have been moved, you will need to tell iTunes about the new location for the Media folder. To do that, press and hold the Option (OS X) or Shift (Windows) key and double-click on iTunes.
- In the dialog box that appears, click on “Choose Library”/
- Navigate your computer to the Media folder’s new location and add it to iTunes.
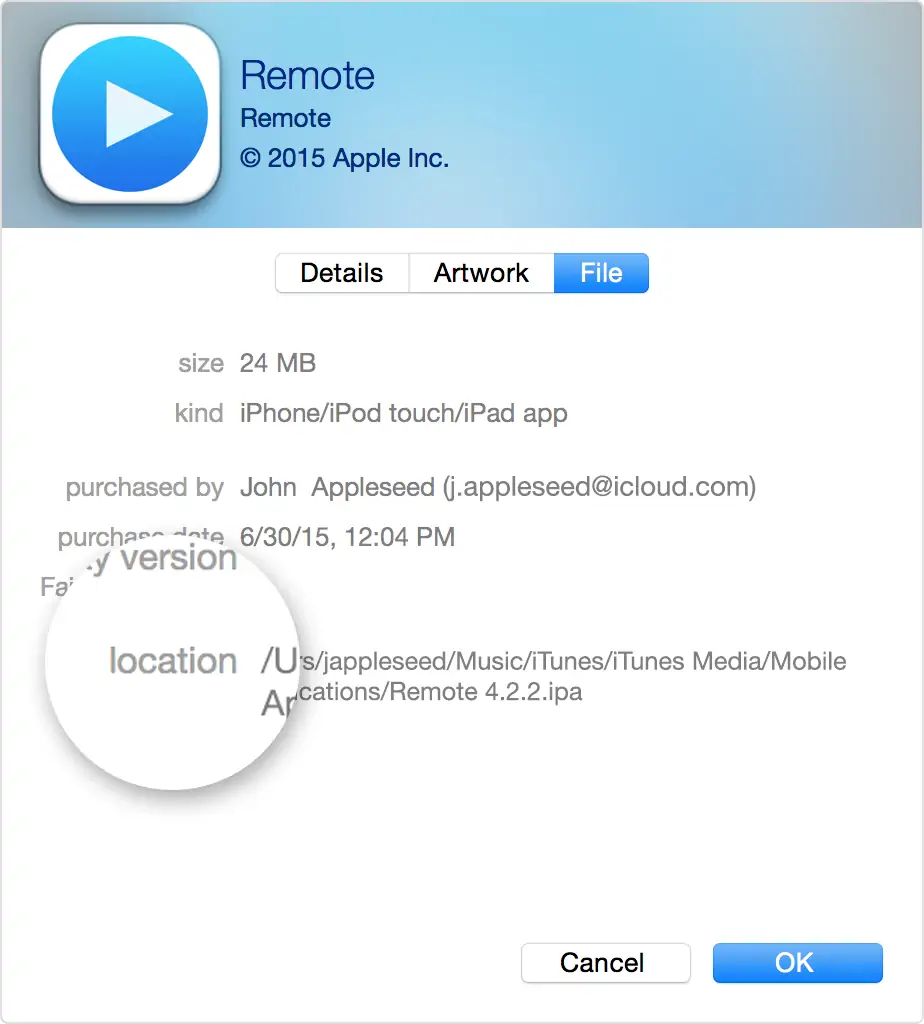
- The app will automatically make any necessary changes and it will start using the new library until you change it again. You can quickly check the location of the current tracks by highlighting an item and pressing Command + I or Ctrl + I for OS X and Windows, respectively.
After verifying that the transfer has been completed successfully, you can delete the old iTunes Media folder as well as the original tracks because everything now resides in your library. This is completely optional but I am guessing that you want to save as much space as possible.


")


