
As we discussed before, WebP is Google’s modern format for lossy and lossless image compressions. It is basically aimed at replacing JPEG, PNG and GIF formats on web, in the long term, due to its reduced file size compared with the three older formats, while maintaining similar or better picture quality.
Since 2010 when it was first announced, the format’s acceptance grew steadily, but it is still far away for wide-stream use: 72.65% supported, according to CanIUse.com. While many image viewers, editors, and converters deal with WebP well these days, Photoshop is yet to support it natively. In this quick guide, we’ll discuss how to open WebP files in Photoshop, with the help of plugins.
How to install and use WebP plugins for Photoshop
You can use one of these two plugins:
1. http://telegraphics.com.au/sw/product/WebPFormat – A plugin by Telegraphics, with support for 32-bit and 64-bit Photoshop on Windows and Mac (CS2/3/4/5/6). The plugin is at version 1.2b4 and was last updated in 2013 so it saves files using an older version of the webp format.
2. https://github.com/fnordware/AdobeWebM#download – A plugin by fnordware, with support for Photoshop on Windows (32-bit and 64-bit) and Mac. This plugin is currently in Beta (v0.5b9) and has been last updated on 16 December 2015.
Download the appropriate plugin file from the links above. We’ll cover here the installation of either one of these plugins, on Windows. For Mac, the process is similar.
In order to select the correct version of the plugins, find out first what version of Photoshop you are using: 32-bit or 64-bit. You can do that by simply opening Photoshop and then going to “Help” > “About Photoshop …” in the upper menu bar. You’ll see here a line containing your version, which ends with either x86 (which is 32-bit) or x64 (meaning 64-bit).
Once you downloaded and extracted the archive containing the plugin file, it’s time to copy/paste it to the correct Photoshop Plugins folder on your PC. That folder is usually “C:\Program Files\Adobe\Adobe Photoshop CC 2018\Plug-ins” or “C:\Program Files\Adobe\Adobe Photoshop CC 2018\Required\Plug-Ins\File Formats”. Previous editions of Photoshop install plugins from a similar folder location.
The file to copy and paste into this folder is “WebPFormat64.8bi” for the first plugin above or “WebP.8bi” for the second plugin, on a Photoshop 64-bit installation. Make sure Photoshop is closed before you copy the plugin file.
Once you copied the plugin file, open Photoshop and hit “File > Open”. In the available formats drop-down, bottom-right, you’ll see the WebP format listed. Also, if you go to “Help > About Plug-In”, you will see the plugin listed there.
Now, when saving files with Photoshop using “Save As…” (Ctrl+Shift+S on Windows), you now have the .webp extension available as well, with lossless or lossy quality.
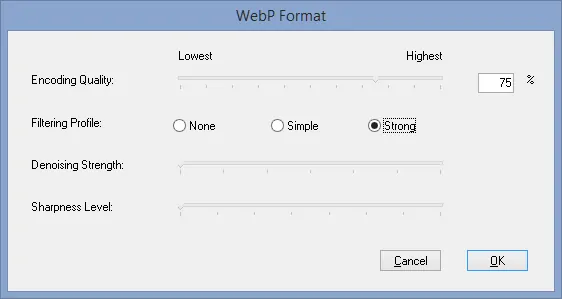
The Telegraphics plugin will show two available formats in the drop-down list: one for lossless and one for lossy. Choose lossy if you want to choose the quality – options will look as in the image below, or lossless if you want the best quality.
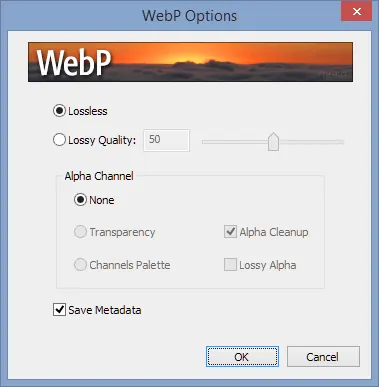
The fnordware plugin has both lossless and lossy options within the same dialog window – see a screenshot of the options below.
If you are not sure whether to save lossy or lossless, think of it this way: if you would save as PNG, you would save as lossless and if you would save as JPEG, you would save as lossy and choose the quality percentage of the output file.
Alternative approach – Convert WebP to JPEG or PNG
If you don’t necessarily need to work with WebP images, you can simply convert them. We covered viewing and converting WebP to a more familiar format in this tutorial, so we’ll only do a quick recap here.
With several good Windows image converters available, our top recommendations are XnConvert or IrfanView, both having batch modes to convert a lot of WebP images fast.
If you’re working with just a few images and need a quick conversion to JPG or PNG, you can use an online file converter such as Download3k’s tool, which uses the latest WebP codec. If you want a quick conversion only, you can convert your WebP files to JPG and if you’re looking for a lossless result, do WebP to PNG instead.
And lastly, if you got your WebP images from a website while browsing it with Chrome, chances are that if you browse the same website in Firefox or Internet Explorer, it will display PNG or JPEG images instead and you can simply use those. This is because Firefox and IE don’t support the WebP format yet, so websites wishing to take advantage of the smaller file size of WebP images will need a duplicate set of images to display to Firefox, IE users.
That’s it. Enjoy working with WebP images in Photoshop!


")


